Silver Soldering Basics
Silver solder although expensive to use, is an extremely effective method to connect non similar metals together. A well done seam is invisible or virtually invisible when complete.
Silver solder comes in several hardness levels which melt at different heat levels.
Extra Easy - Melt temperature: 1,145°F (618°C) Flow temperature: 1,207°F (653°C)
Easy - Melt temperature: 1,240°F (671°C) Flow temperature: 1,325°F (718°C)
Medium - Melt temperature: 1,275°F (691°C) Flow temperature: 1,360°F (738°C)
Hard - Melt temperature: 1,365°F (741°C) Flow temperature: 1,450°F (788°C)
Extra Hard - Melt temperature: 1,370°F (743°C) Flow temperature: 1,490°F (810°C)
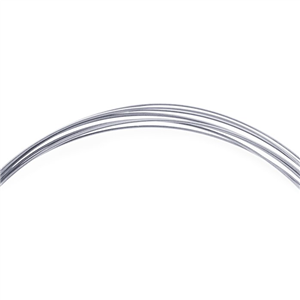
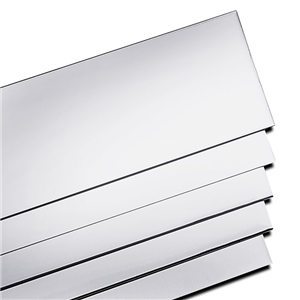
Silver solder also comes in several different forms, for example wire and sheet
Silver solder comes in several hardness levels which melt at different heat levels.
Extra Easy - Melt temperature: 1,145°F (618°C) Flow temperature: 1,207°F (653°C)
Easy - Melt temperature: 1,240°F (671°C) Flow temperature: 1,325°F (718°C)
Medium - Melt temperature: 1,275°F (691°C) Flow temperature: 1,360°F (738°C)
Hard - Melt temperature: 1,365°F (741°C) Flow temperature: 1,450°F (788°C)
Extra Hard - Melt temperature: 1,370°F (743°C) Flow temperature: 1,490°F (810°C)
Silver solder also comes in several different forms, for example wire and sheet
Silver solder when used correctly will solder a joint of similar or dissimilar metals that is virtually unbreakable. Non ferrous and ferrous metals like brass, copper, iron and steel can all be soldered together. Forget about aluminium that requires a whole different process. The parts to be soldered can be any size. Knowing the colours of heated metals is an asset here. From dull red to cherry red is an indication whether of not you can use soft solder or hard solder. For pickling we used a hot pickle solution. Do not put iron into the pickle. Use non ferrous tools ( copper tweezers) for adding and removing metals from the pickle. There are exceptions to the following.
When silver soldering your imagination is the limit.
The following are the steps required in silver soldering different metals together: copper to brass, steel to brass and copper to copper.
When silver soldering your imagination is the limit.
The following are the steps required in silver soldering different metals together: copper to brass, steel to brass and copper to copper.
Example 1: Copper and Brass
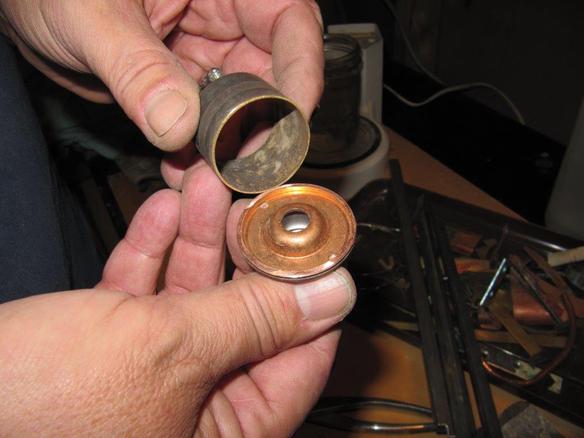
Silver soldering copper and brass.
A brass tube is to be soldered to a copper base. Depending on the size of the materials to be soldered a propane torch is adequate. For really large pieces oxyacetylene or MAP gas is recommended. All ventilation and safety percautions must be observed.
A brass tube is to be soldered to a copper base. Depending on the size of the materials to be soldered a propane torch is adequate. For really large pieces oxyacetylene or MAP gas is recommended. All ventilation and safety percautions must be observed.
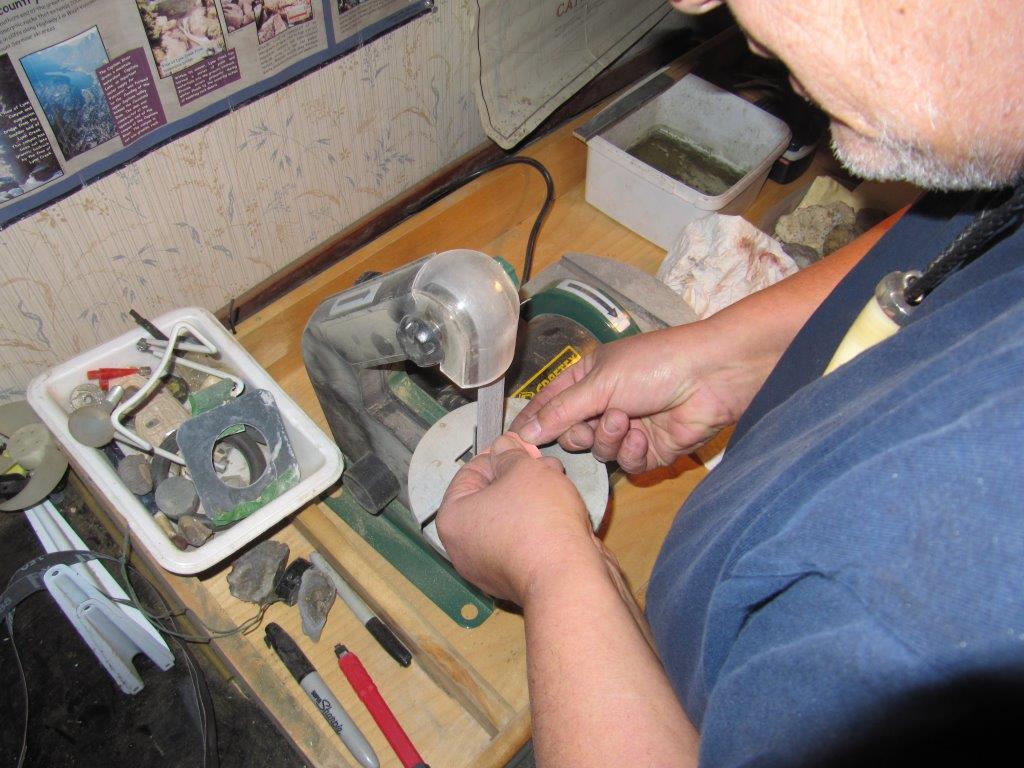
Use a flat file to cleanup and smooth any rough, uneven, or dirty bonding surfaces. No grease, rust or other contaminents should be on the surfaces to be soldered. They must be very clean and there cannot be a gap between the pieces to be soldered. Although the silver solder flux helps to remove this contamination it's best to have the parts cleaned before fluxing. Deburring edges, sanding to expose bare surfaces and cleaning with acetone will guarantee a well soldered joint.

Flux both connecting surfaces thoroughly . It sometimes helps to warm the pieces and apply the flux which sticks better to a warmed surface.
Start heating both pieces, start with the larger, and or thicker piece. Keep heating all the way around both pieces until both pieces are completely red hot. For this demo we were using hard solder so it took a while to heat the parts to the required temp.

In the above right hand photo you see a greenish flame. This is an indication that the copper is getting too hot and it begins to oxidize. Back awayfrom the heated piece until green flame goes away, and once both pieces are the same red colour apply the solder. If the material is the correct temperature the solder will melt and flow like water. If not at the correct temperature the solder will melt but will not flow and remain as a lump on the surface. In this piece once the correct temperature was reached the solder infilled all the way around the joint.
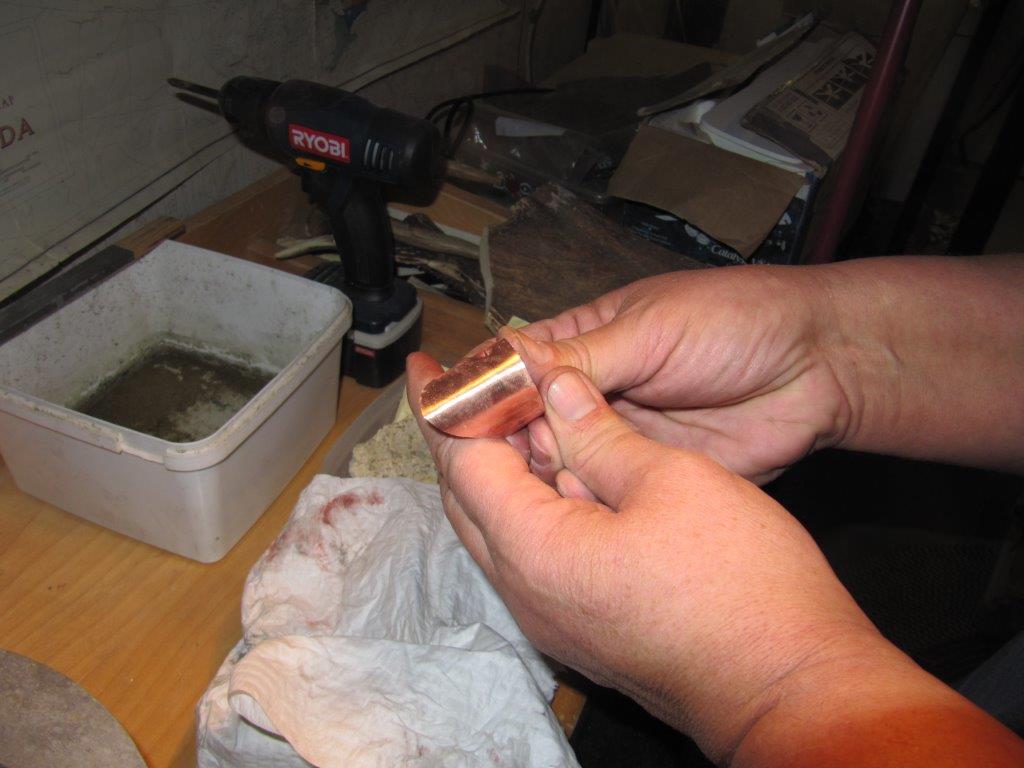
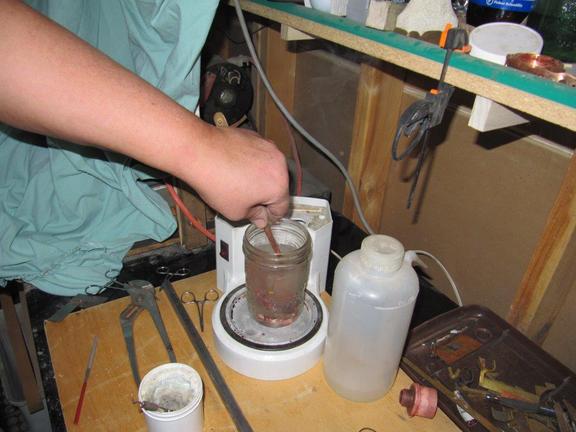
Place the completed piece into the pickle while still hot. The "freezing" (hot metal meeting warm pickle) will loosen any flux left on the metal. The longer in the pickle the more scale will be removed.
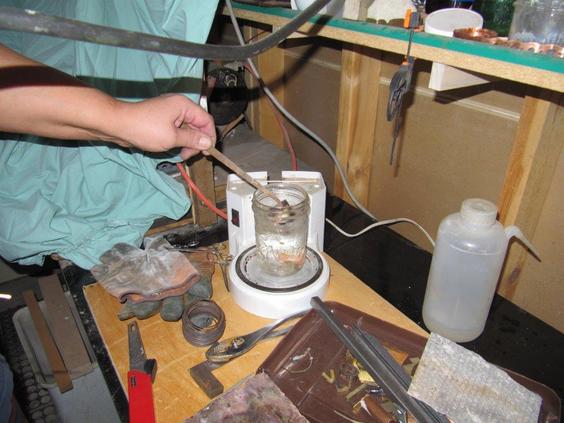
Pickle is used to remove surface oxidation and flux from silver, gold, copper and most other non ferrous metals after soldering or casting.
Pickle performs best when heated to 140°F (60°C). An old coffee maker base is perfect for this although there are commercial models of heaters available.
Use non ferrous tweezers to add and remove materials from the pickle. Check that all the flux has been removed.
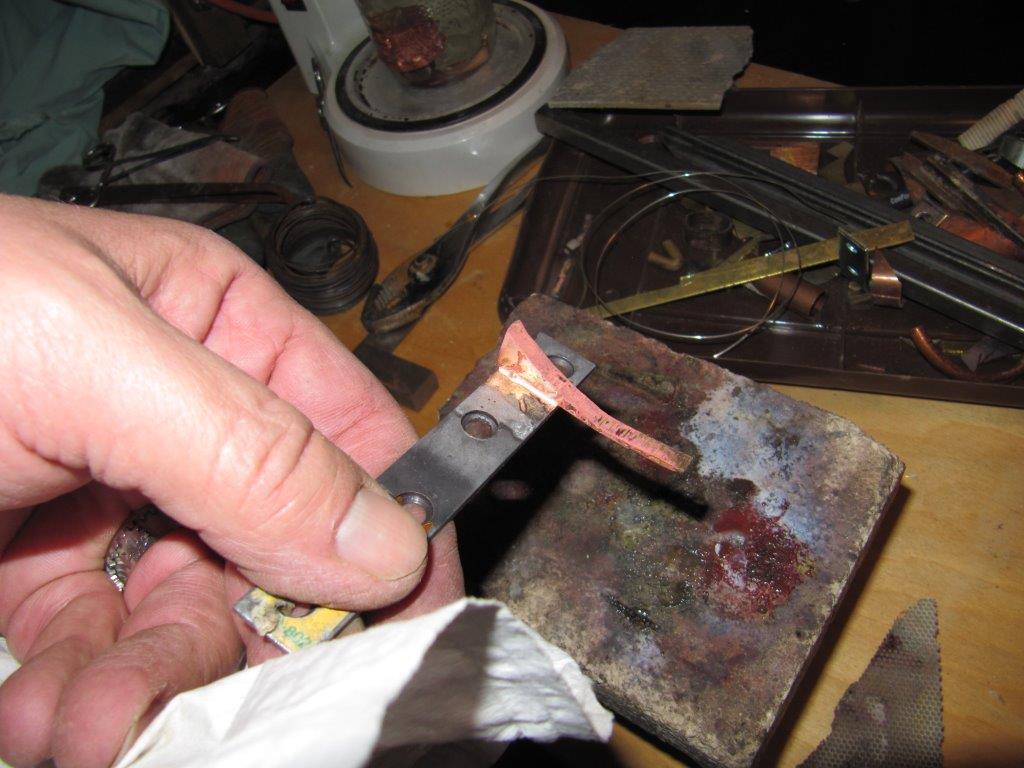
Example 2: Steel and Brass
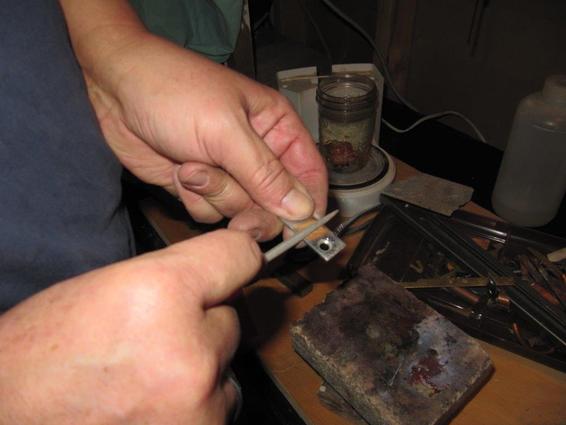
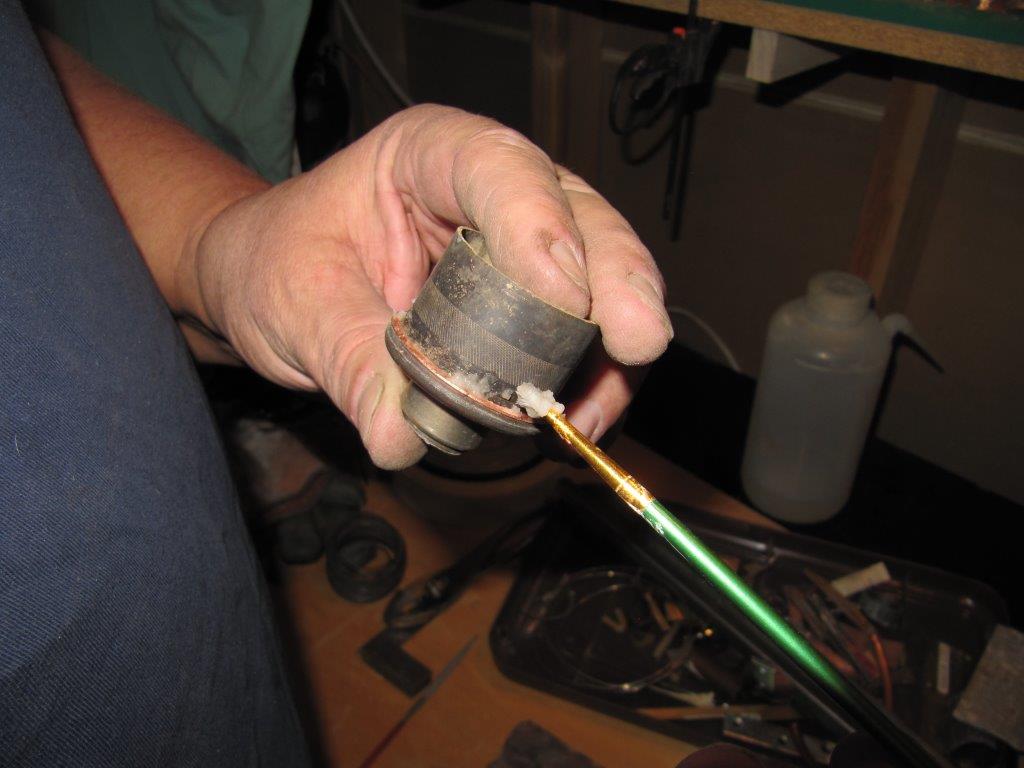
Here we will be soldereing a piece of brass to a piece of steel. The steel had a chrome coating which had to be removed to expose the bare metal. Use a flat file to clean mating surface and a wipe with acetone will clean the area to be soldered. The brass piece edge to be soldered was checked for flatness and trued up with a file. Both pieces were checked for fit.
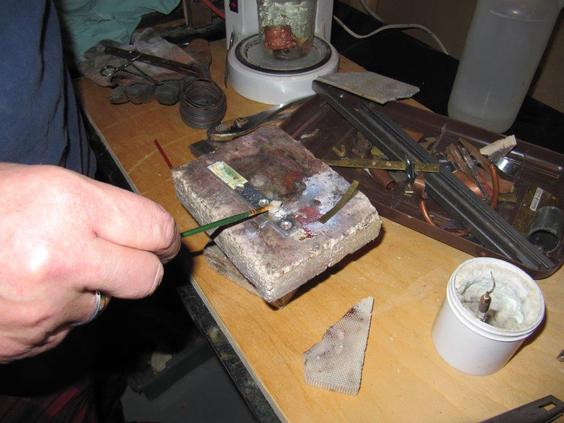
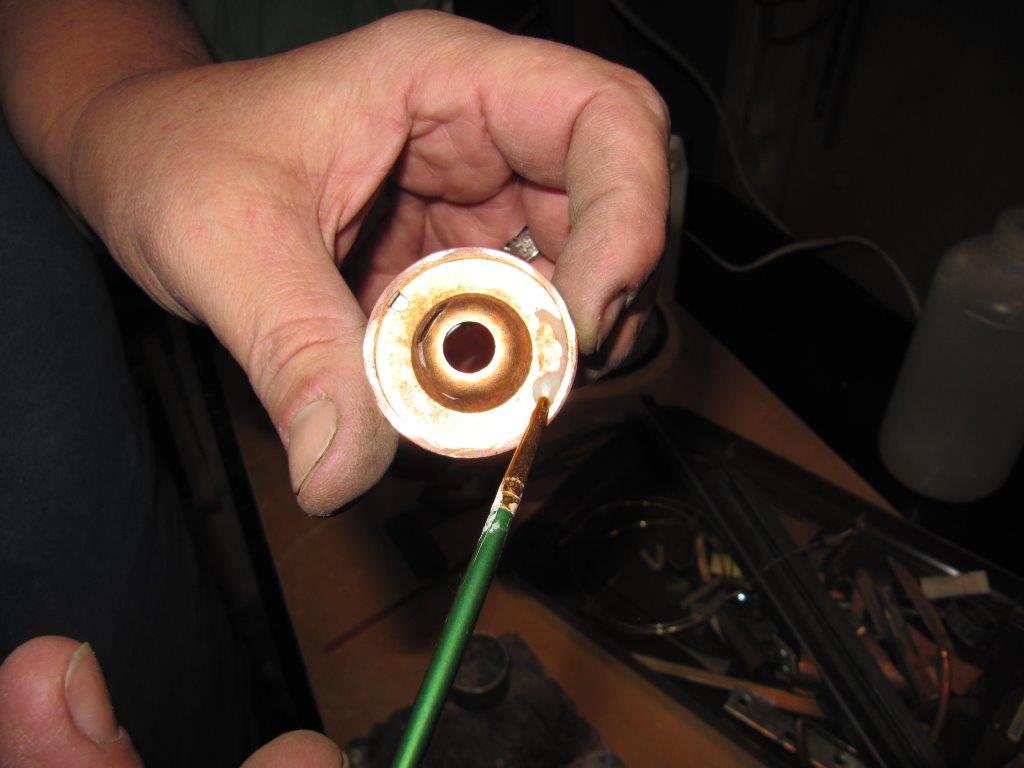
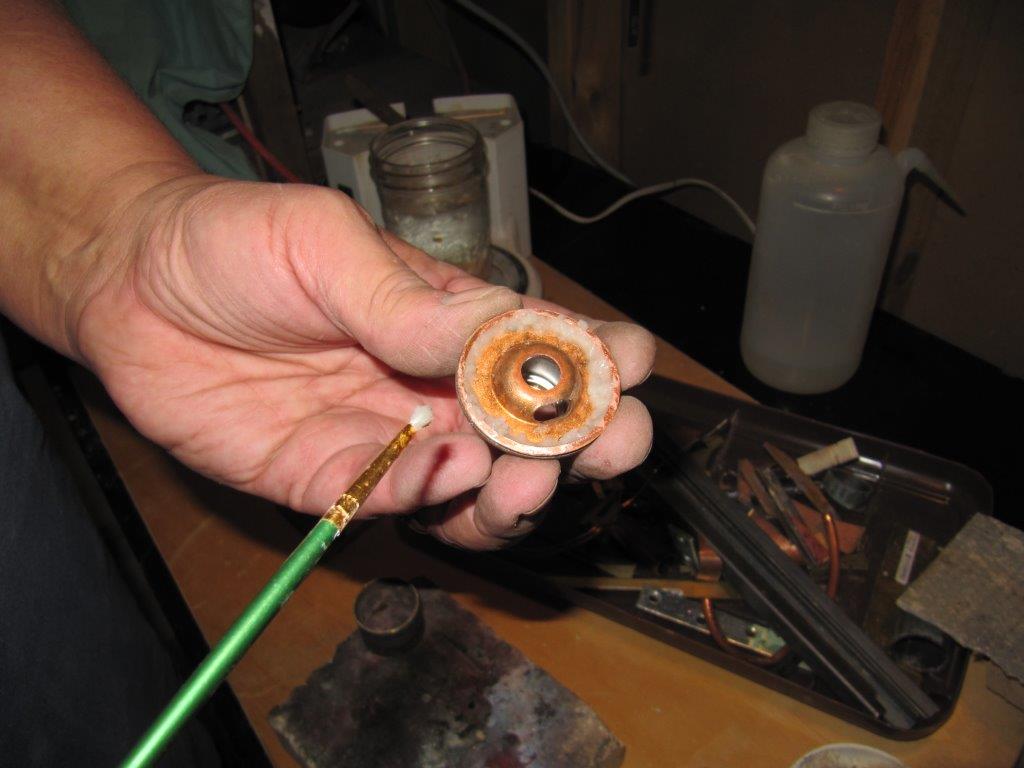
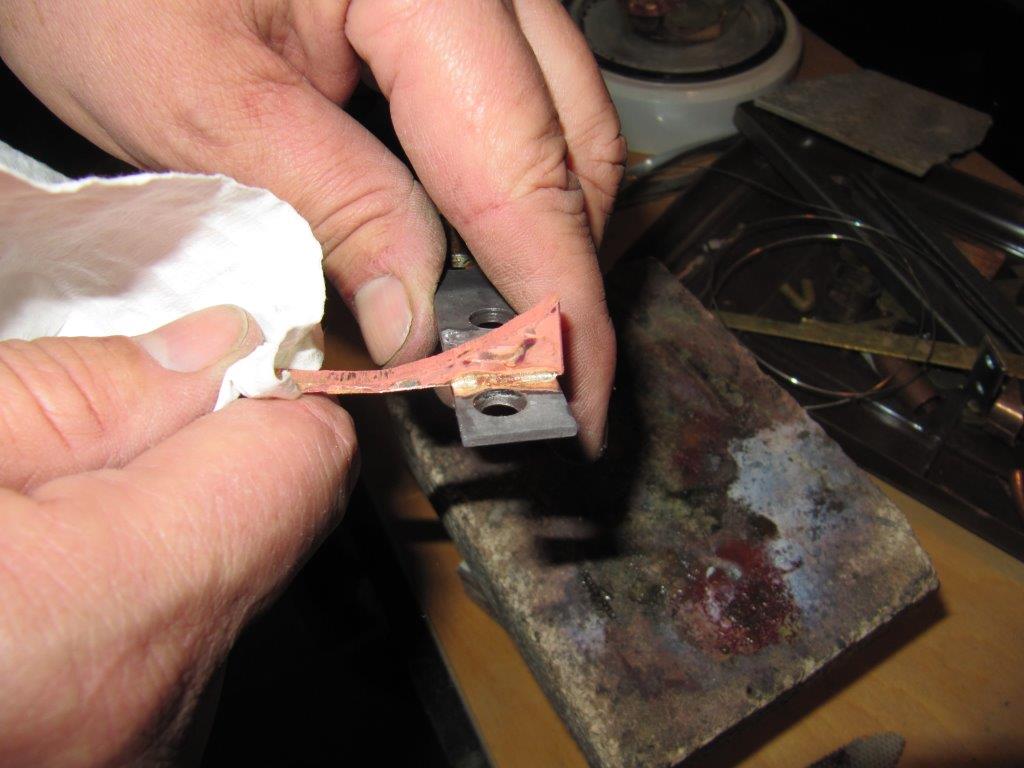
It's best to flux both pieces to guarantee a perfect solder bond. Gently heat both pieces and apply flux so that it sticks to the metal as a white coating.
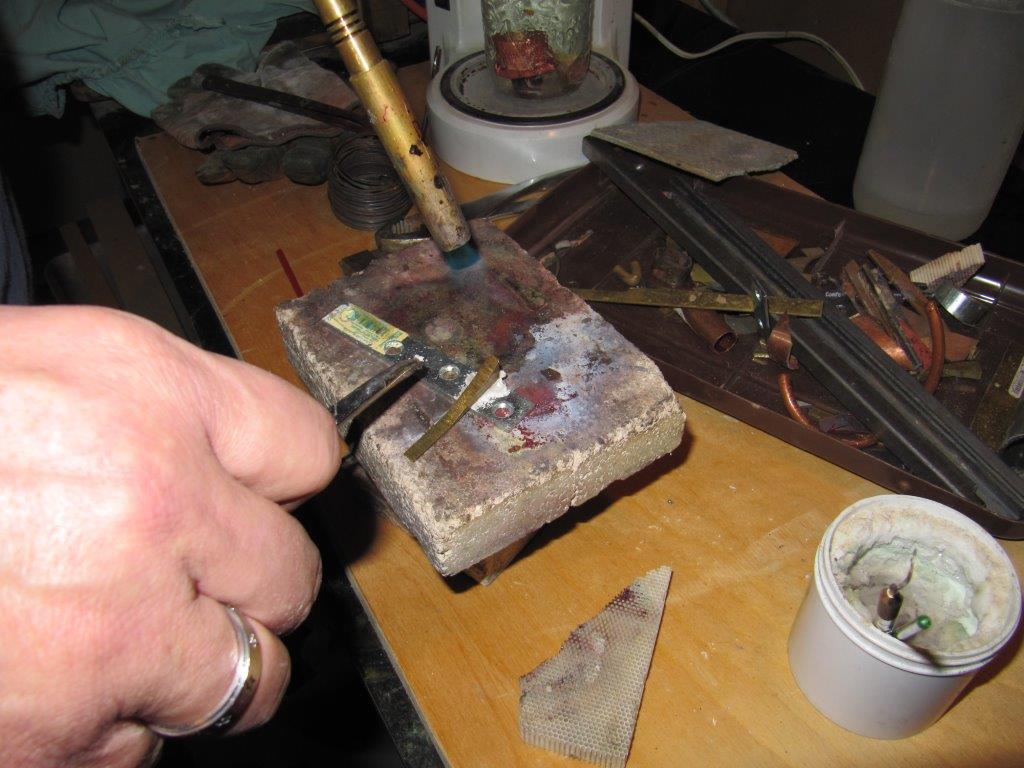

Place pieces together and again check the fit. Heat the pieces starting with the largest piece remembering that metals heat at different rates depending on their composition. Once both pieces are red hot the flux will develop a clear glass like consistency. Align the pieces to the shape you require, start applying your silver solder. The solder will melt and flow around and under and through the joint sealing it. Keep applying heat throughout the whole process until you are satisfied with the results. If the parts misalign as they cool reheat until the solder is molten and readjust alignment

Remove heat and immerse into pickle for a couple of seconds.. Be careful of splattering of hot pickle, remove immediately (remember iron and pickle don't mix) and rinse with water.
If you do not want to use pickle immerse the hot parts in ordinary water. This helps to remove some flux, the remainder has to be removed with a wire brush or sanding. Dry and check solder joint and if satisfied with the alignment of the soldered joint, time to clean up.
If the flux is not totally removed from the soldered piece it will develop a verdigris coating on the brass and the steel will begin to rust.
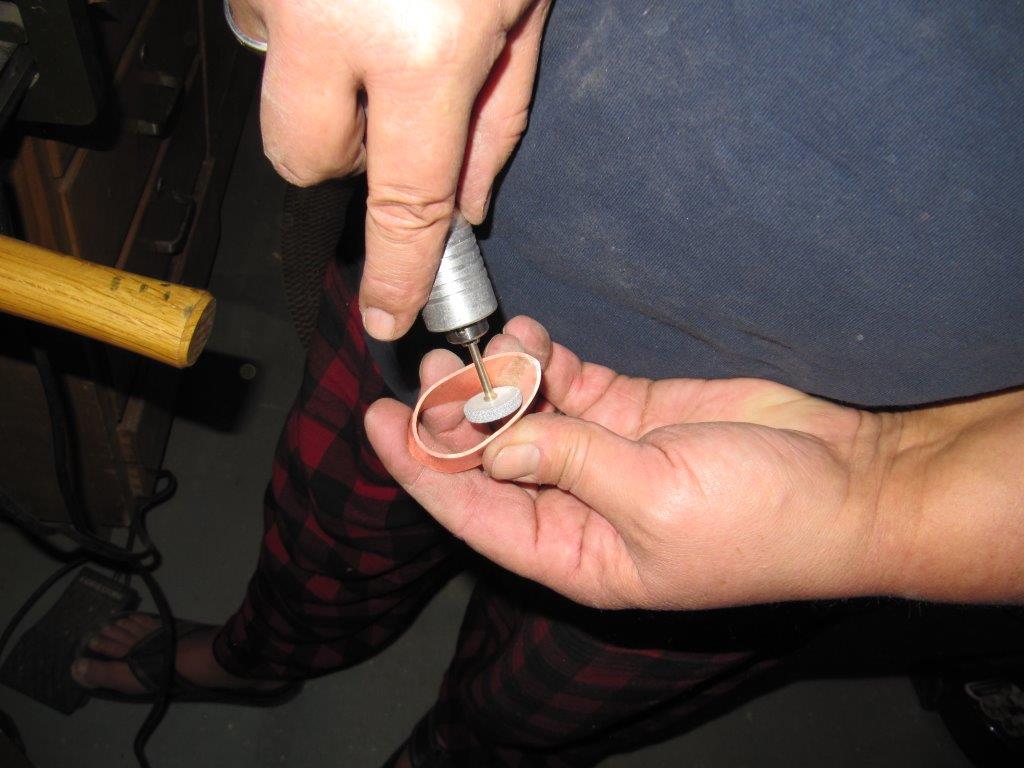
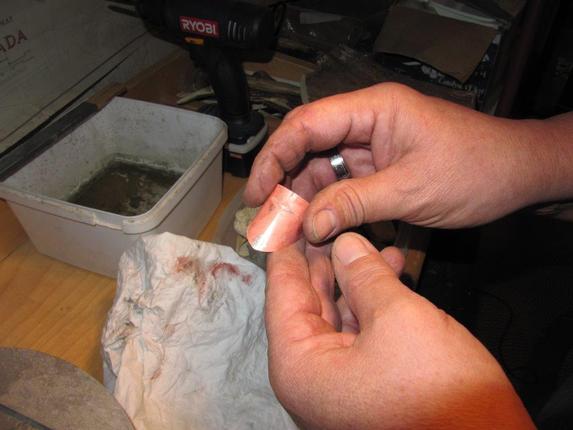
Use sandpaper and files to further clean up the joint. The soldered joint should appear almost invisible between the two joined parts.
If you do not want to use pickle immerse the hot parts in ordinary water. This helps to remove some flux, the remainder has to be removed with a wire brush or sanding. Dry and check solder joint and if satisfied with the alignment of the soldered joint, time to clean up.
If the flux is not totally removed from the soldered piece it will develop a verdigris coating on the brass and the steel will begin to rust.
Use sandpaper and files to further clean up the joint. The soldered joint should appear almost invisible between the two joined parts.

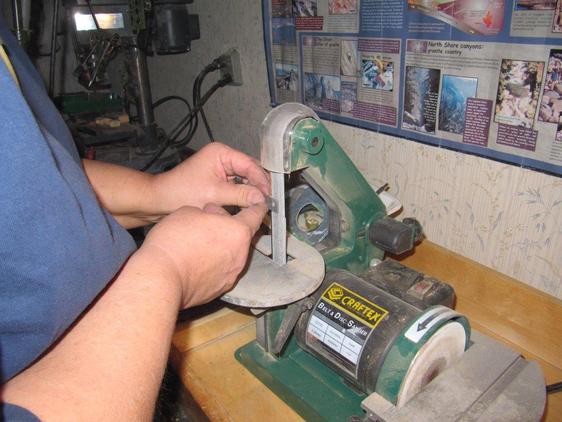
Even though the pickle does a good job of cleaning the piece it helps to further clean with sanding belts and other abrasive materials.
Now you can check the fit of the soldered joint;
resolder if necessary and pickle.
Now you can check the fit of the soldered joint;
resolder if necessary and pickle.
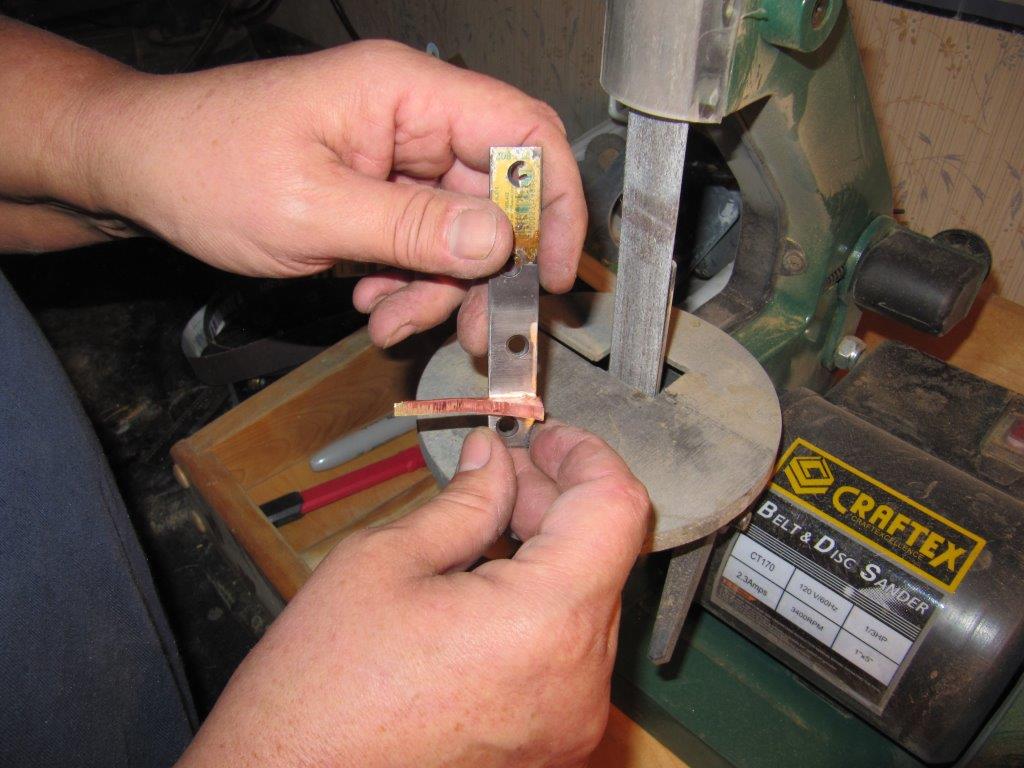

We tried to shear of the soldered joint in a vise and all it did was bend the metal. The bond was perfect. You now have a virtually unbreakable joint. This process can be used to repair items at home or in the workshop
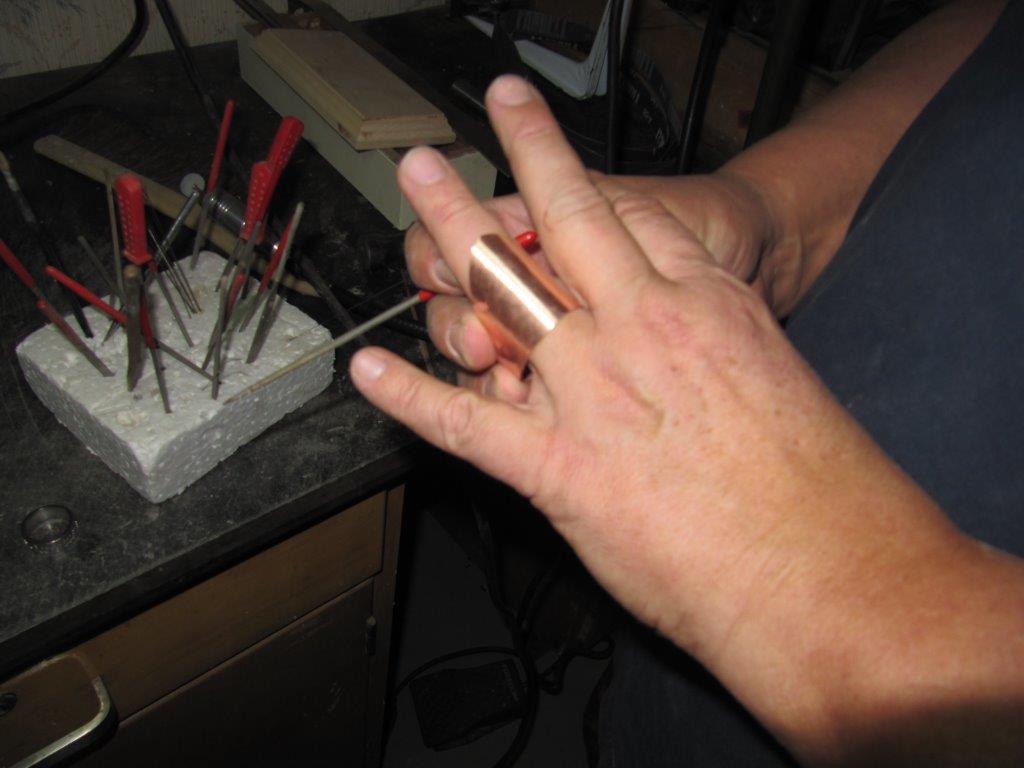
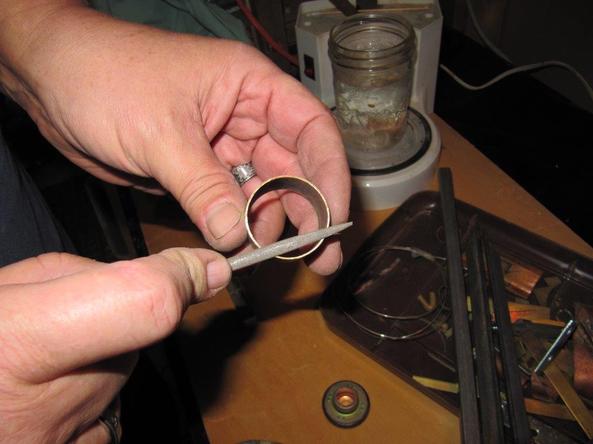
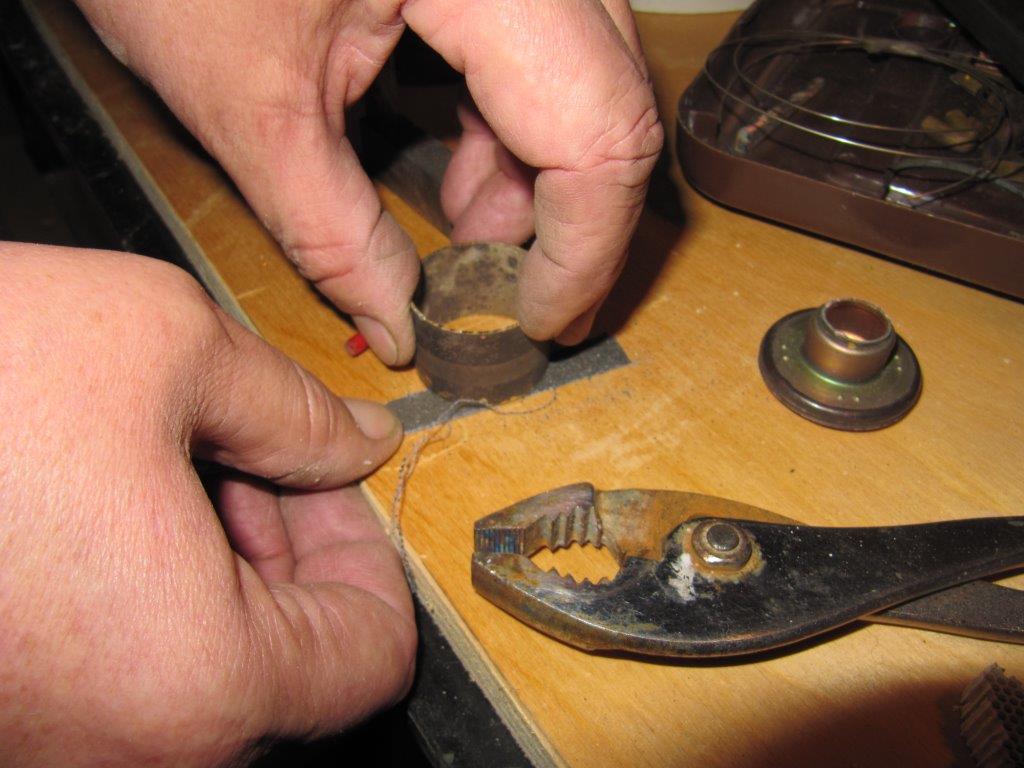
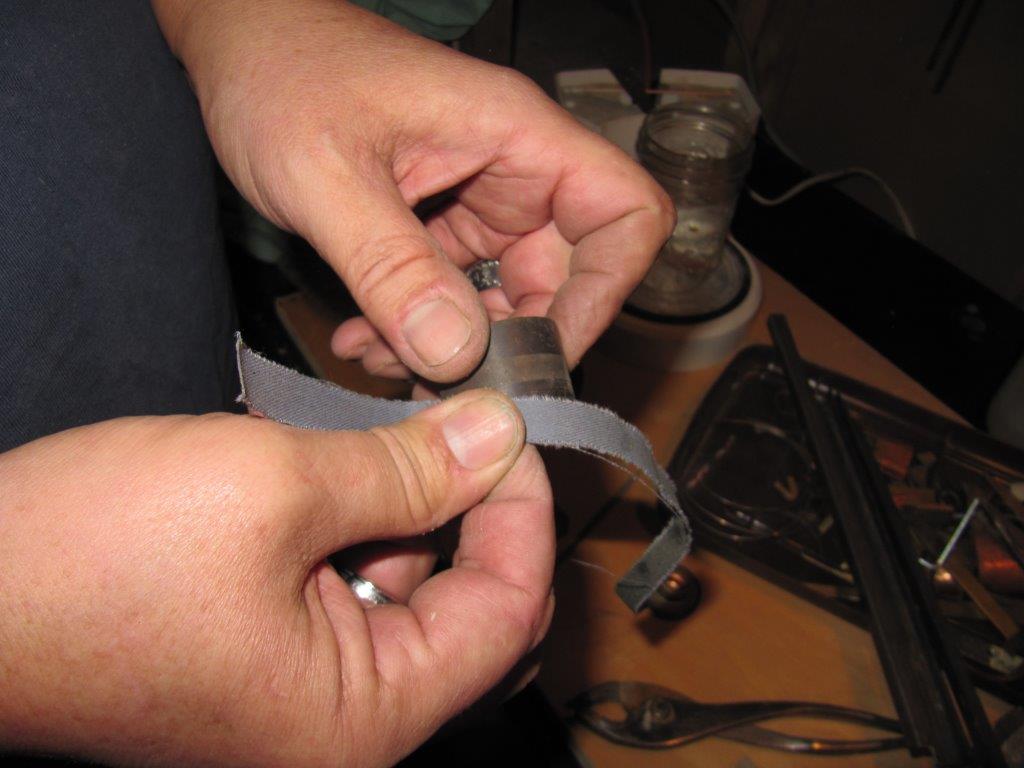
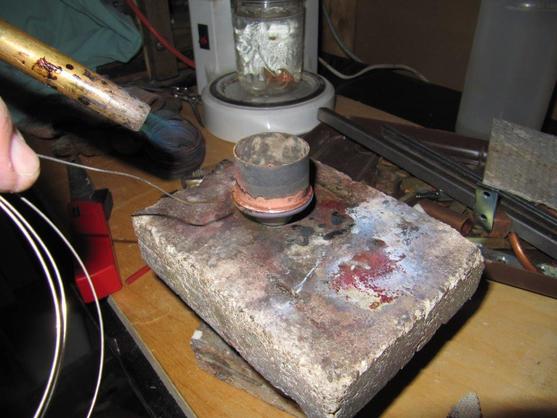
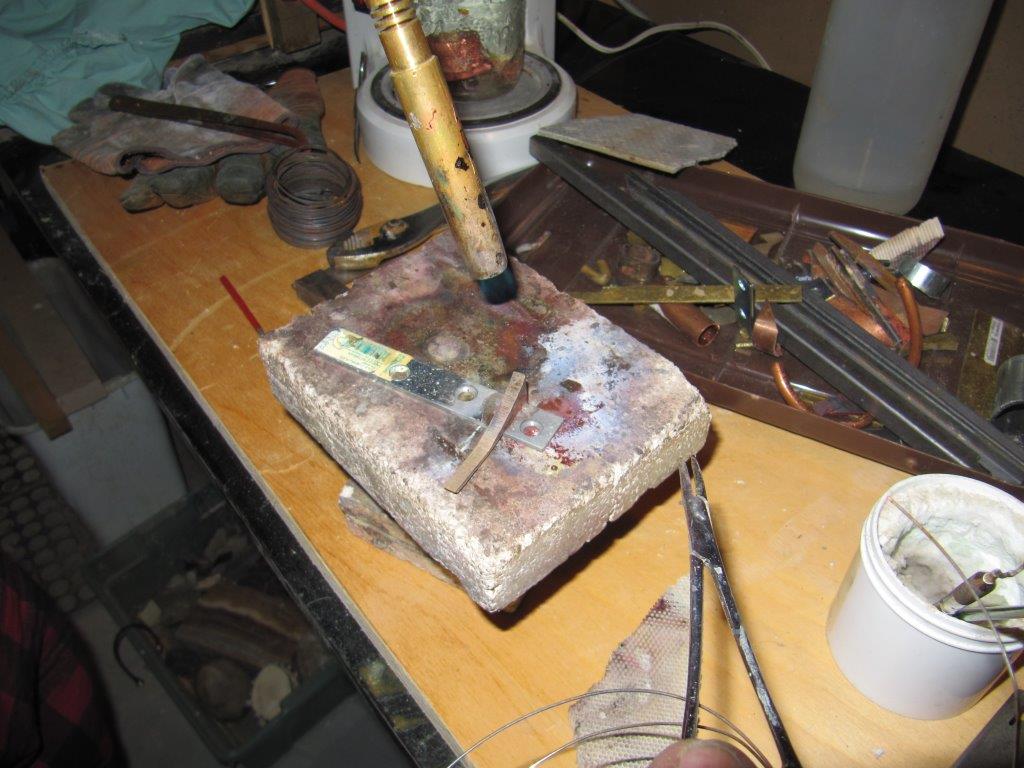
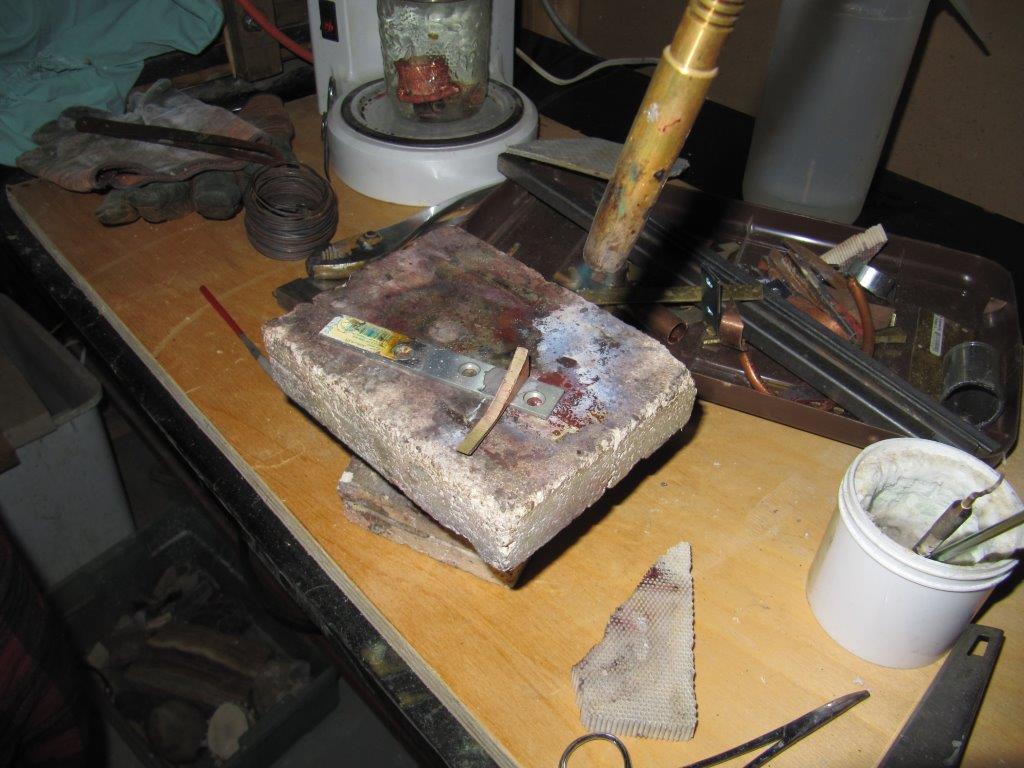
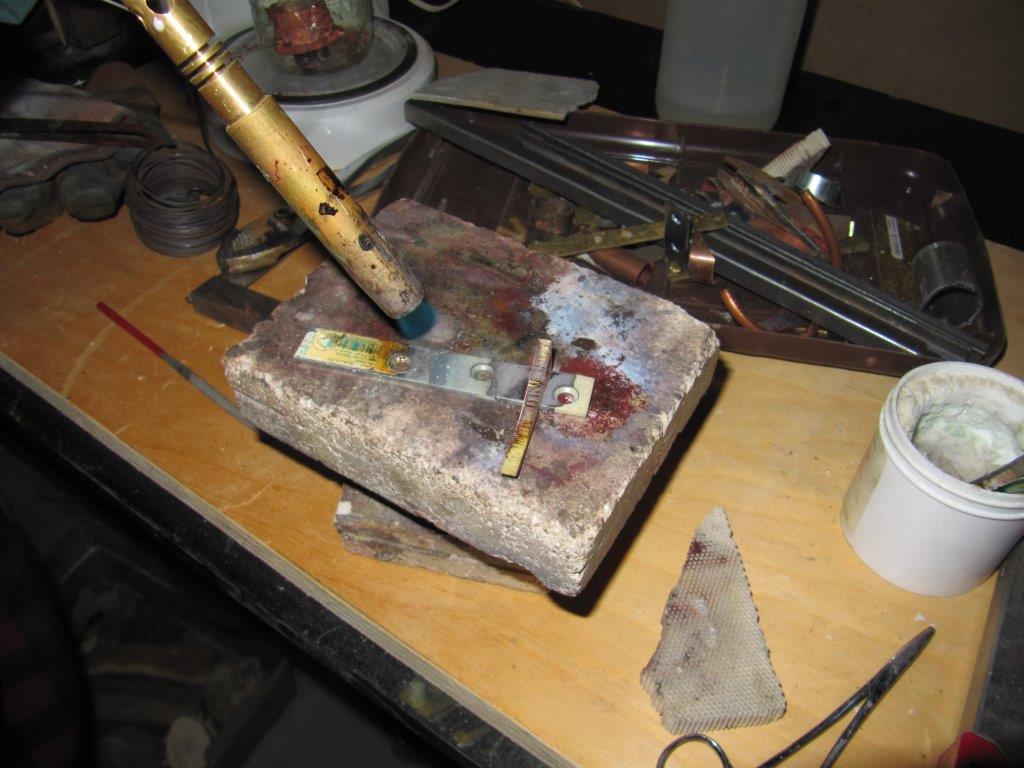
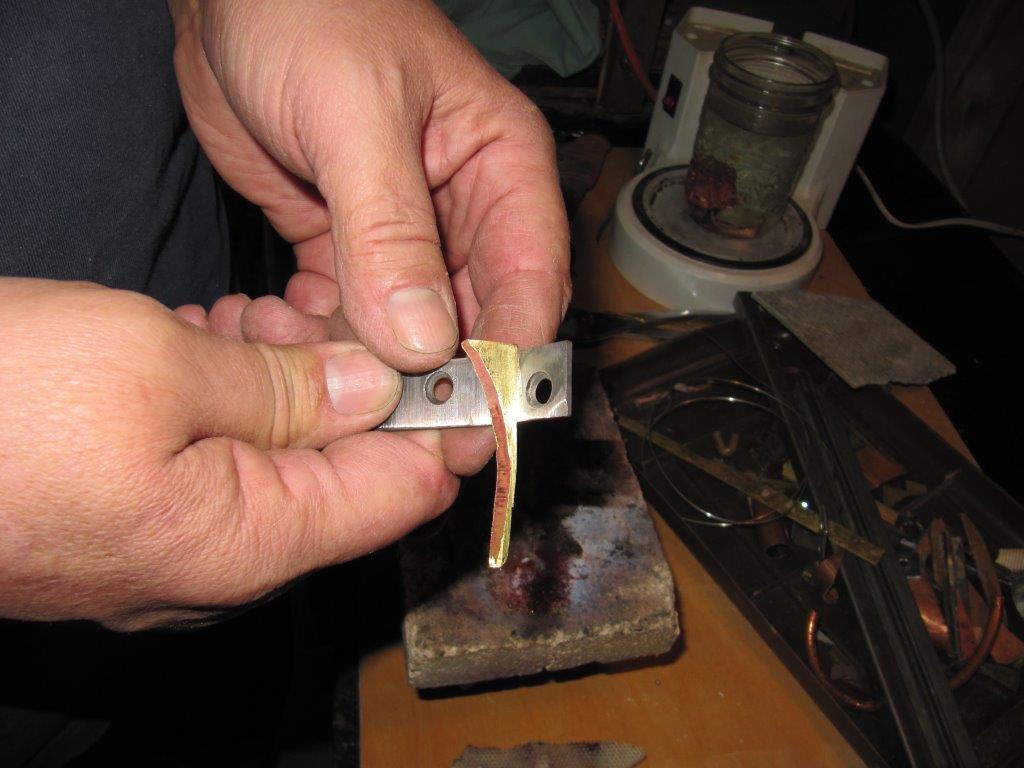
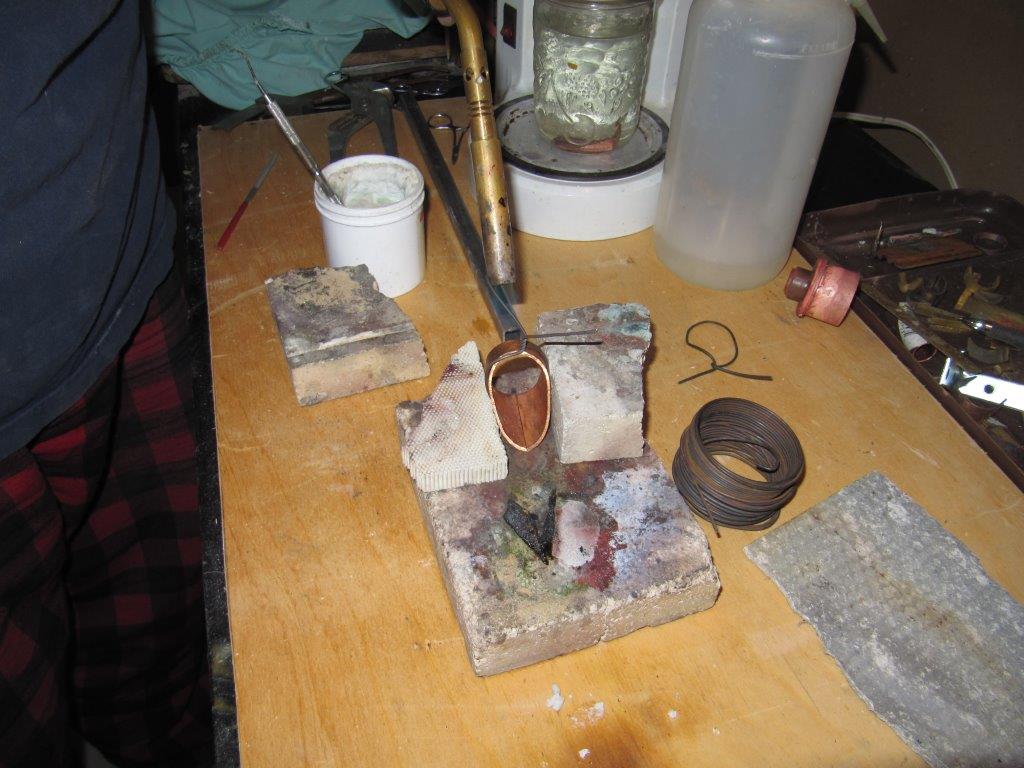
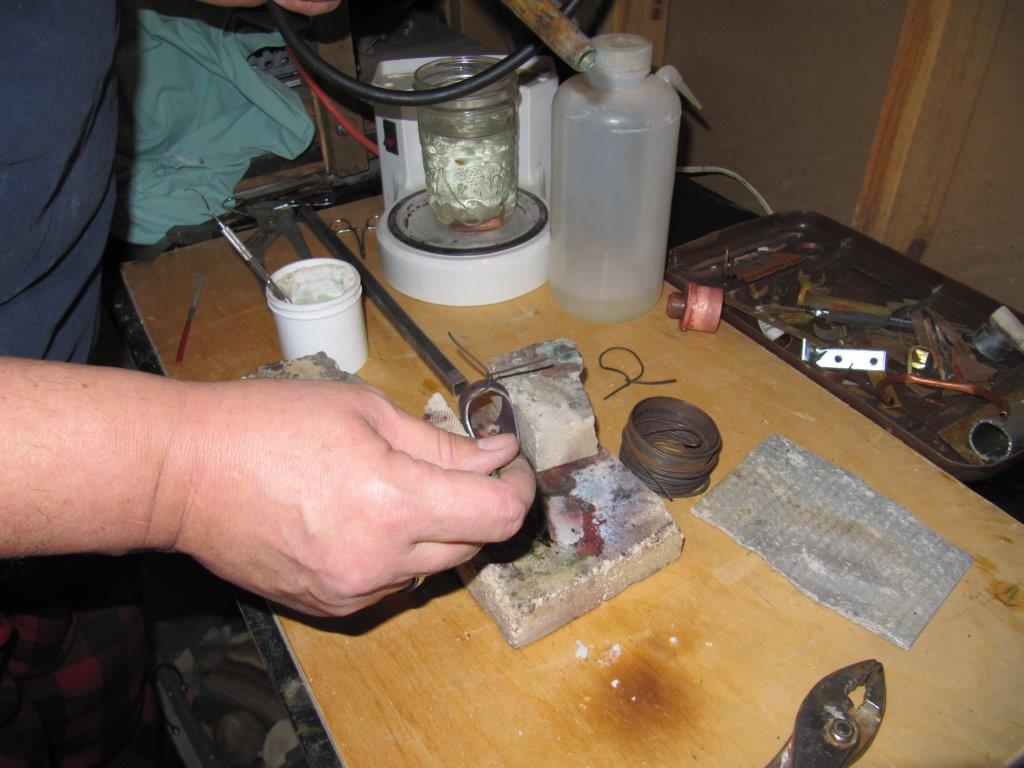
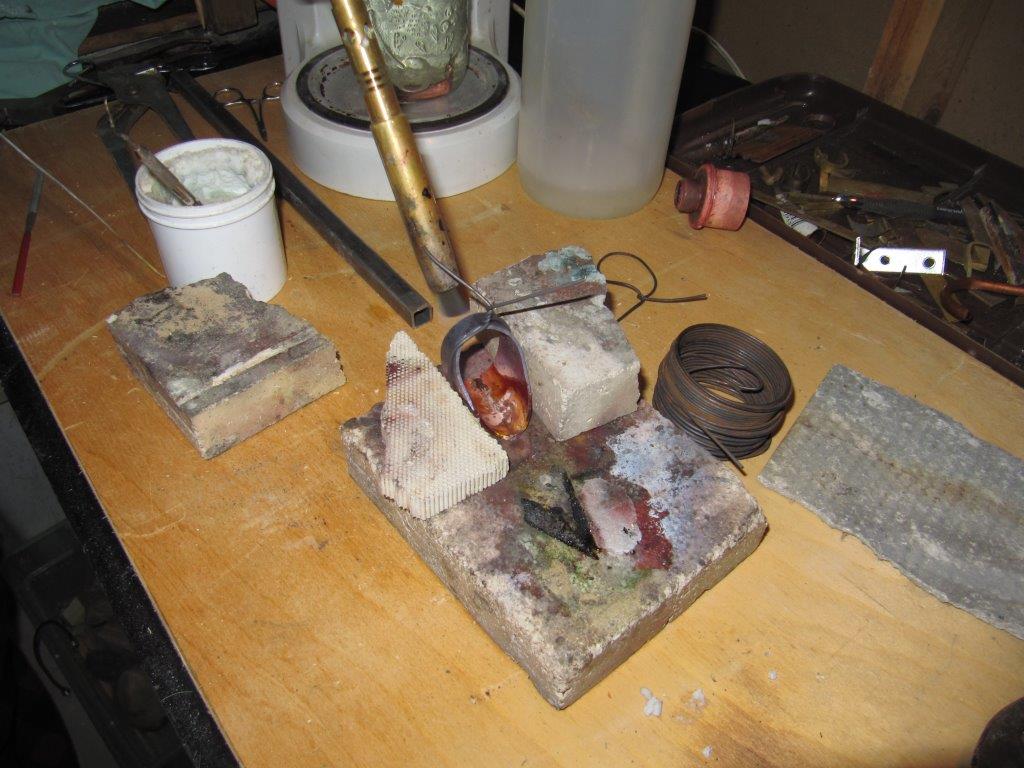
Example 3: Copper Seam
Soldering a seam on a copper ring.
It is best to have the material to be soldered annealed first as this will help you to be able to bend the material easily especially when doing curves.
It is best to have the material to be soldered annealed first as this will help you to be able to bend the material easily especially when doing curves.
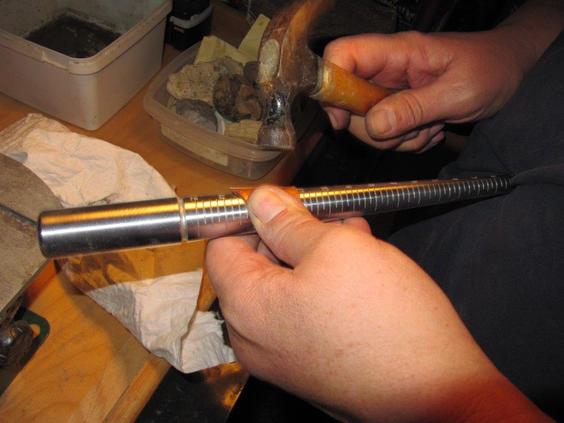
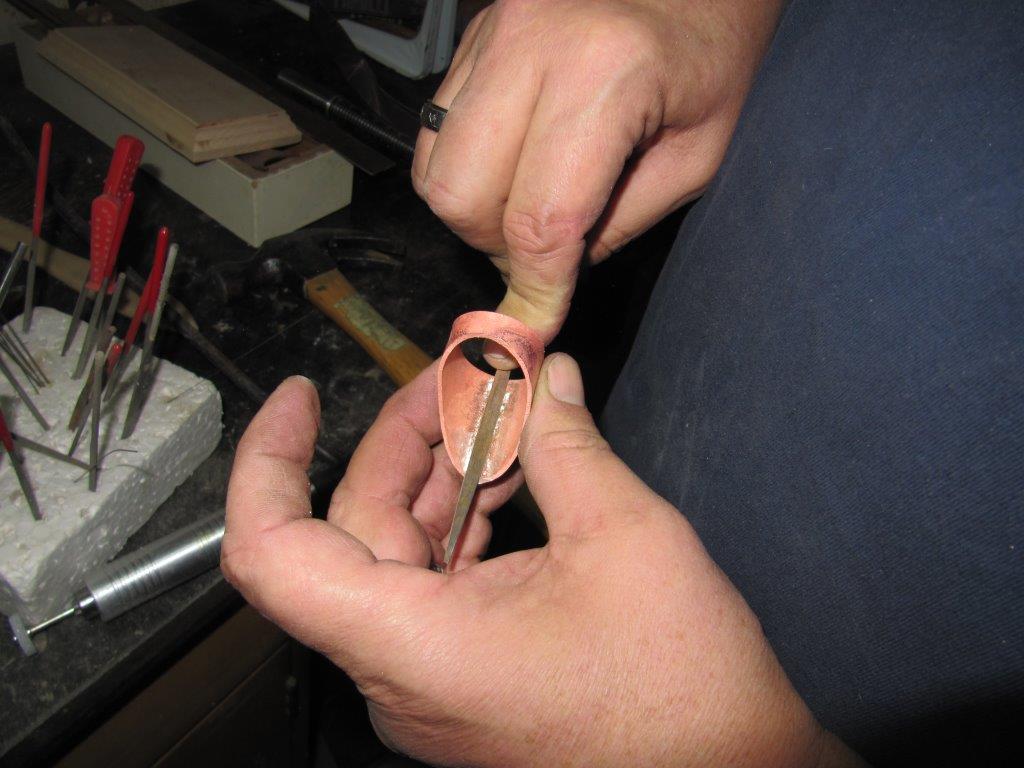
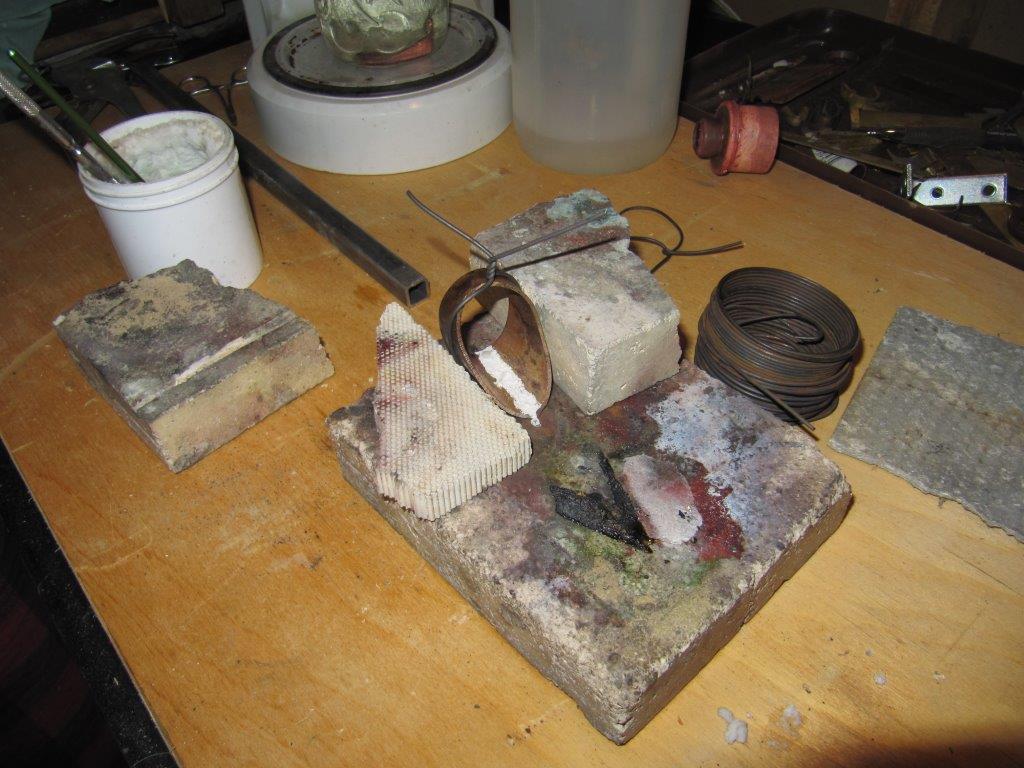
Use a mandrel to ensure the seam is flat before soldering and the joint has no space visible between the two edges

One method to hold the seam together is to use a piece of soft wire. Do the twist tie on the opposite side of the solder joint in case of solder overflow. If the tie is on the side of the joint, flux and solder can flow into the twist tie and then the wire is very difficult to remove.
The edges to be soldered must not have any gaps visible. Silver solder does not fill gaps!
The edges to be soldered must not have any gaps visible. Silver solder does not fill gaps!
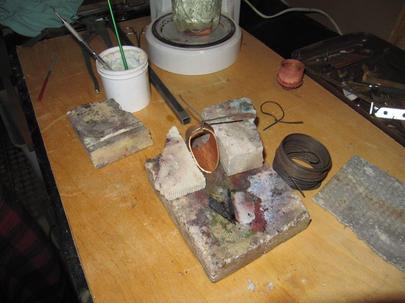
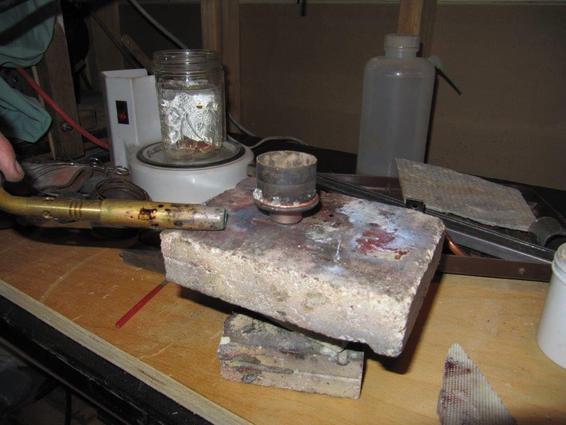
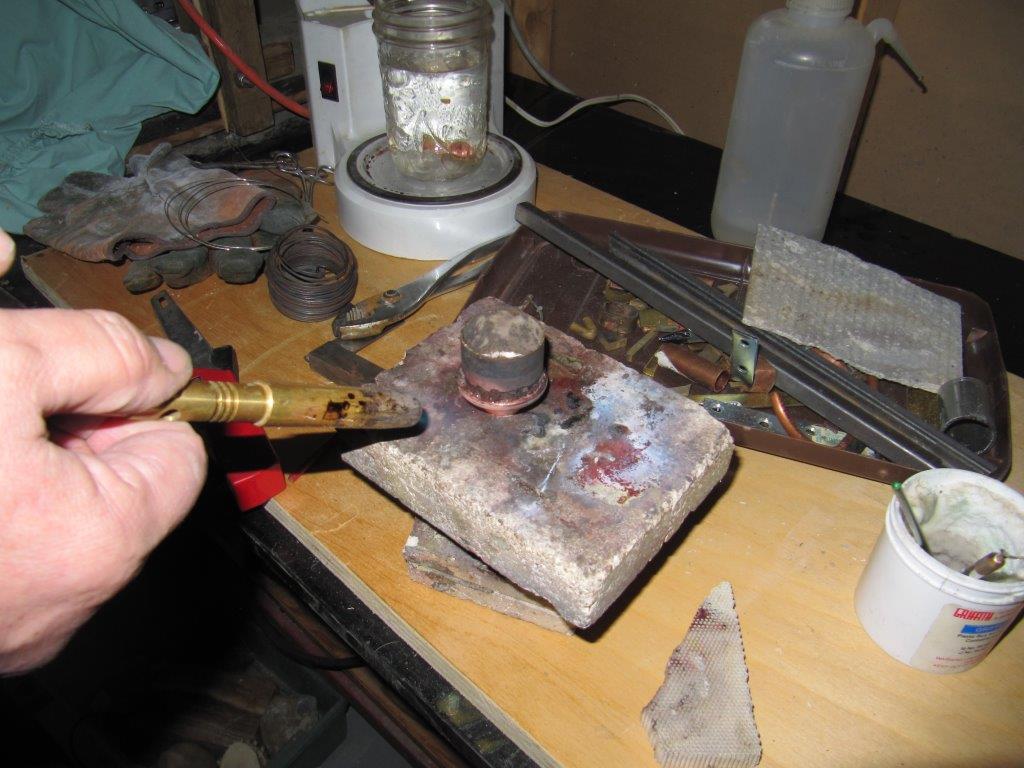
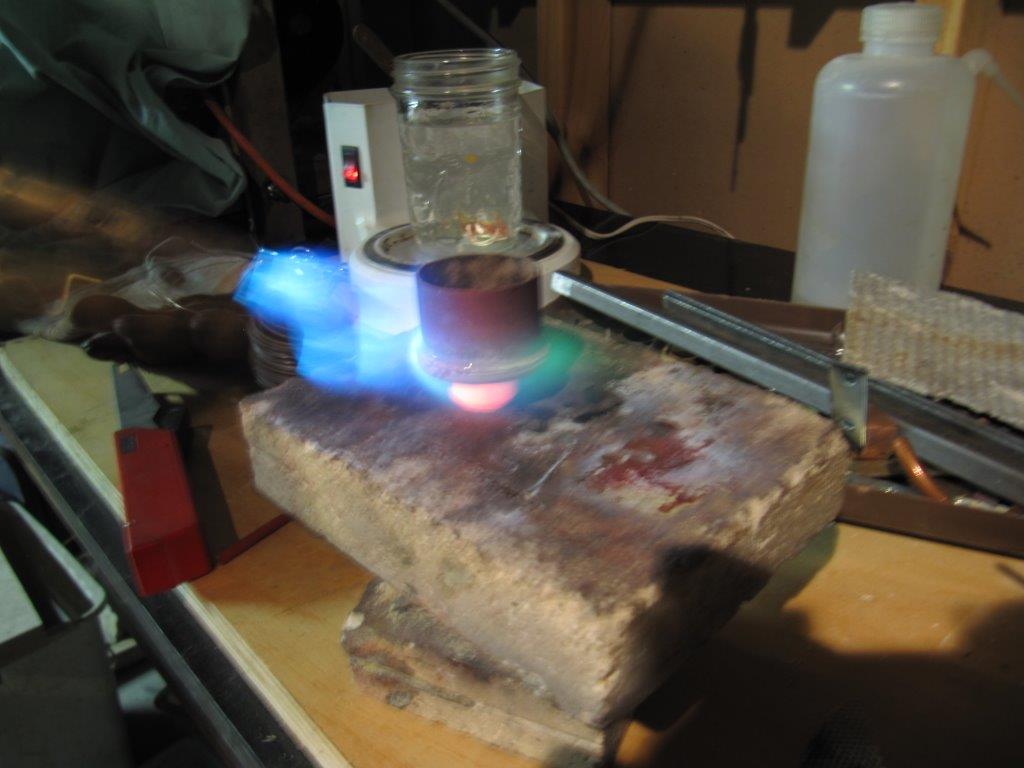
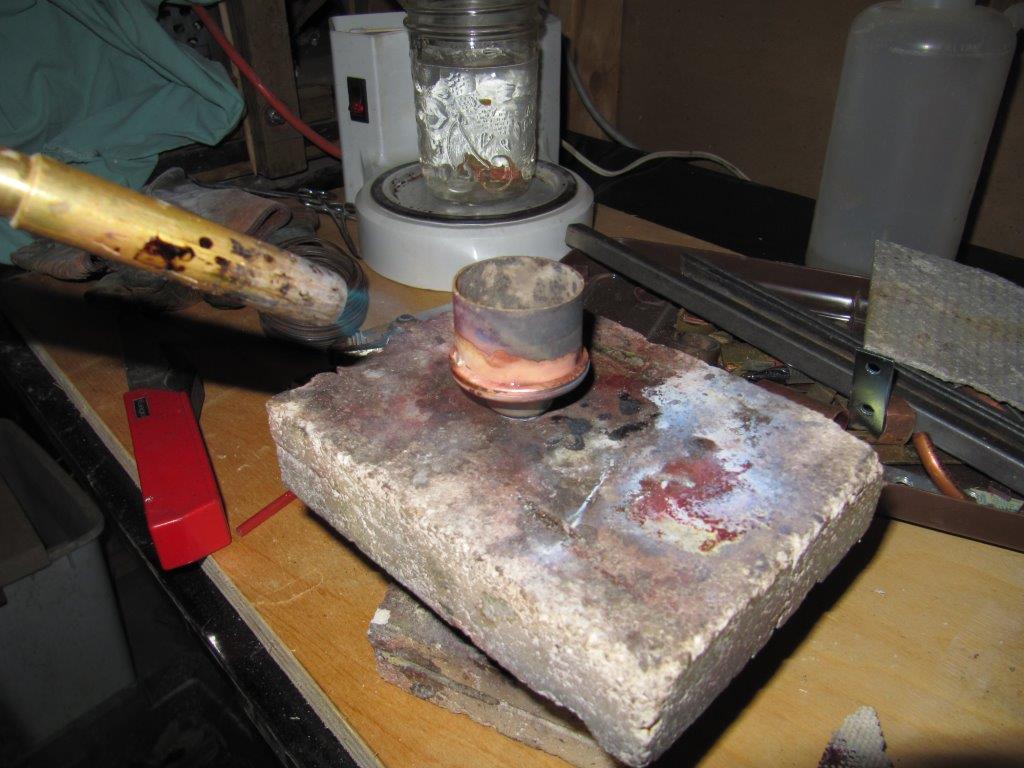
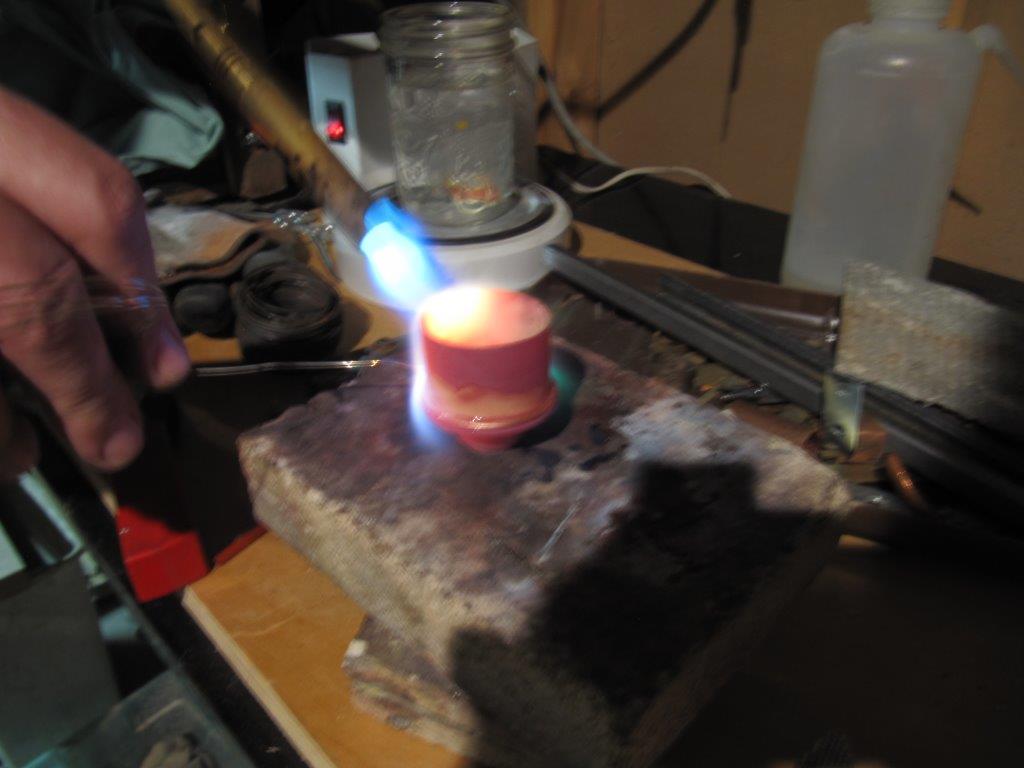
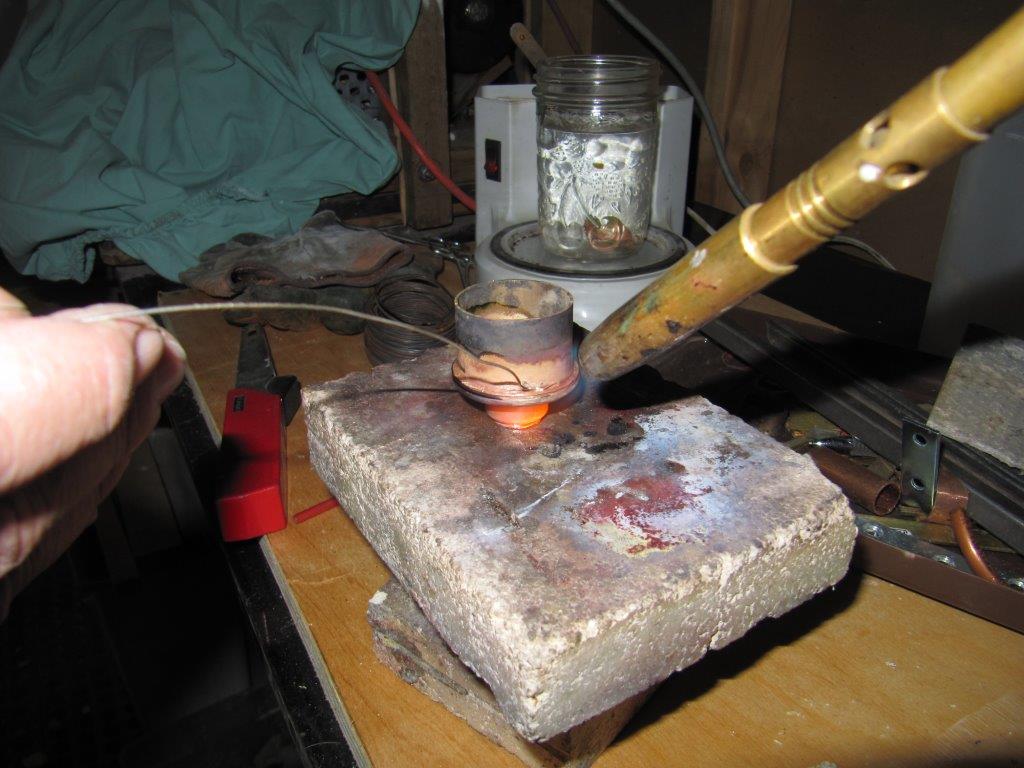
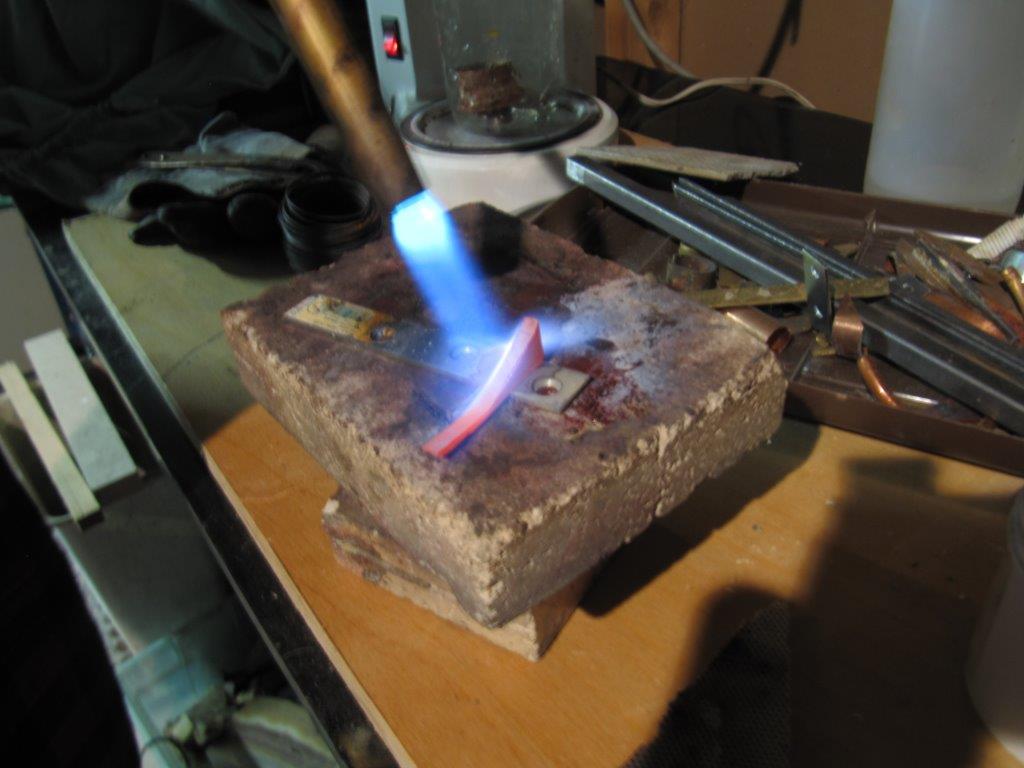
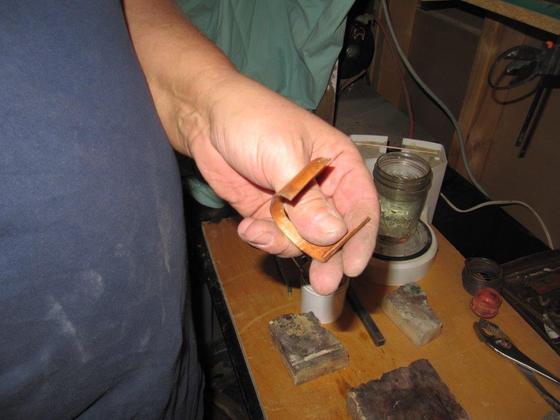
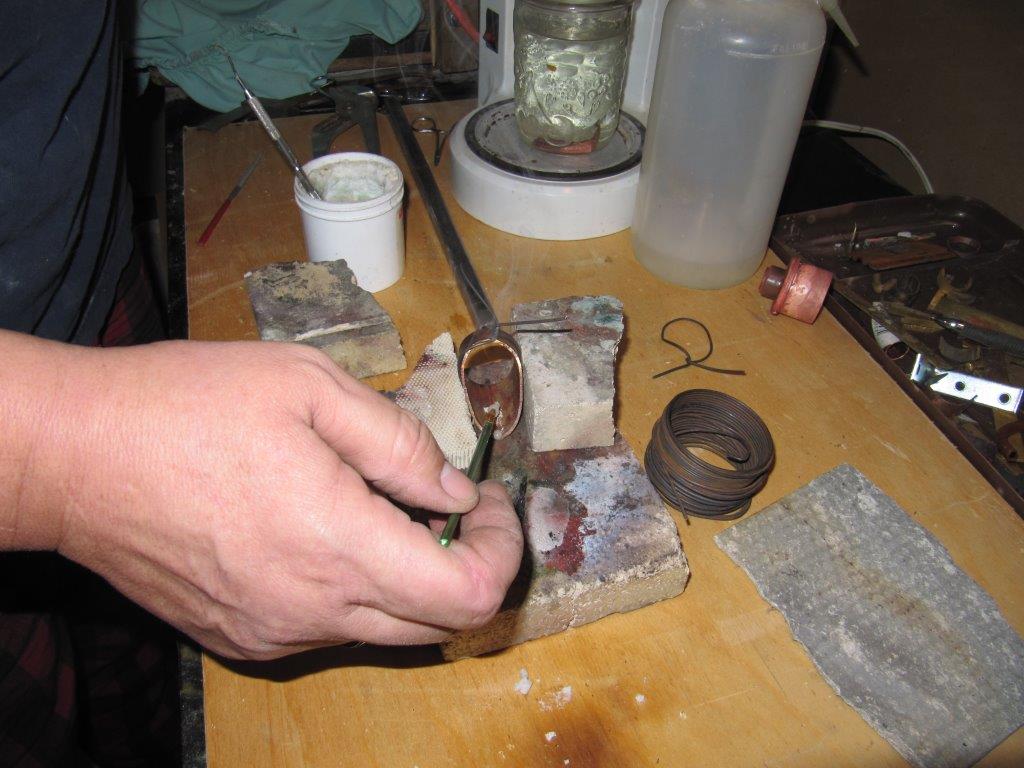
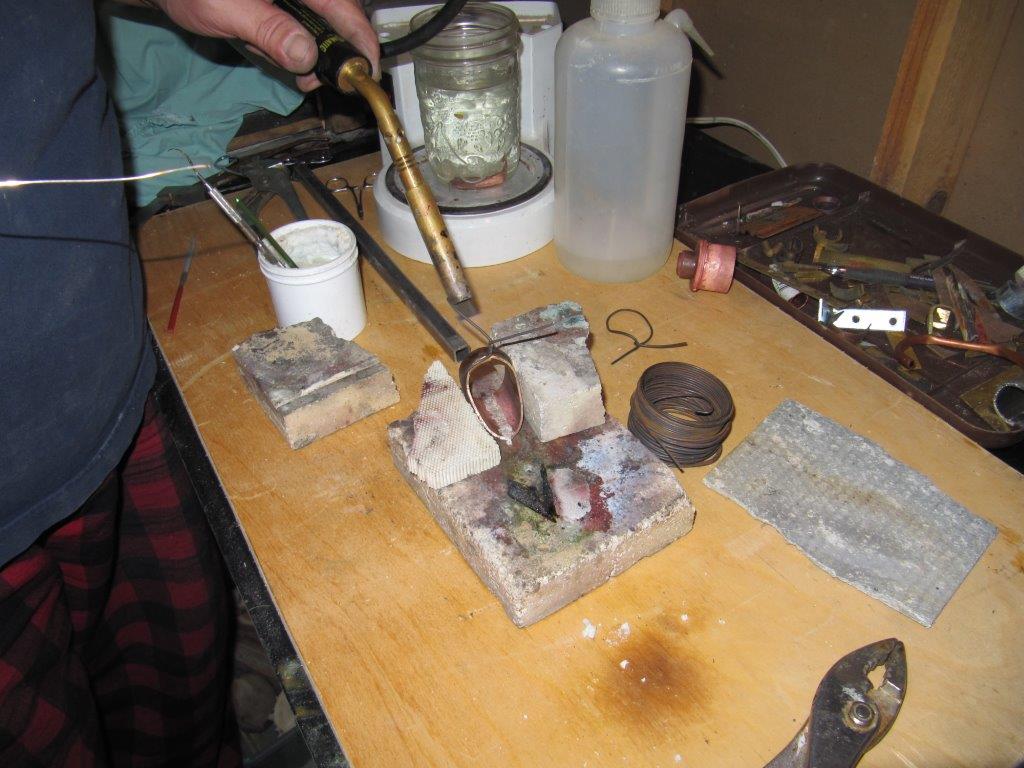
Block your piece to hold it steady using fire brick or similar material.
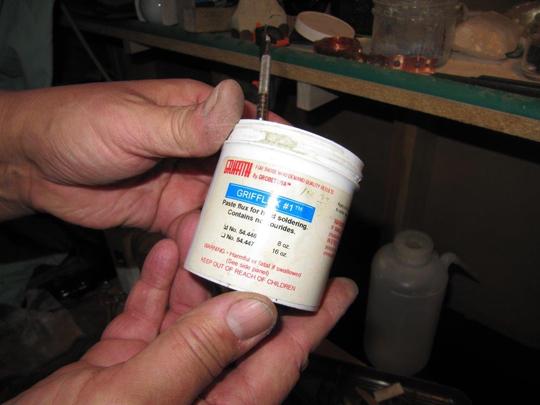
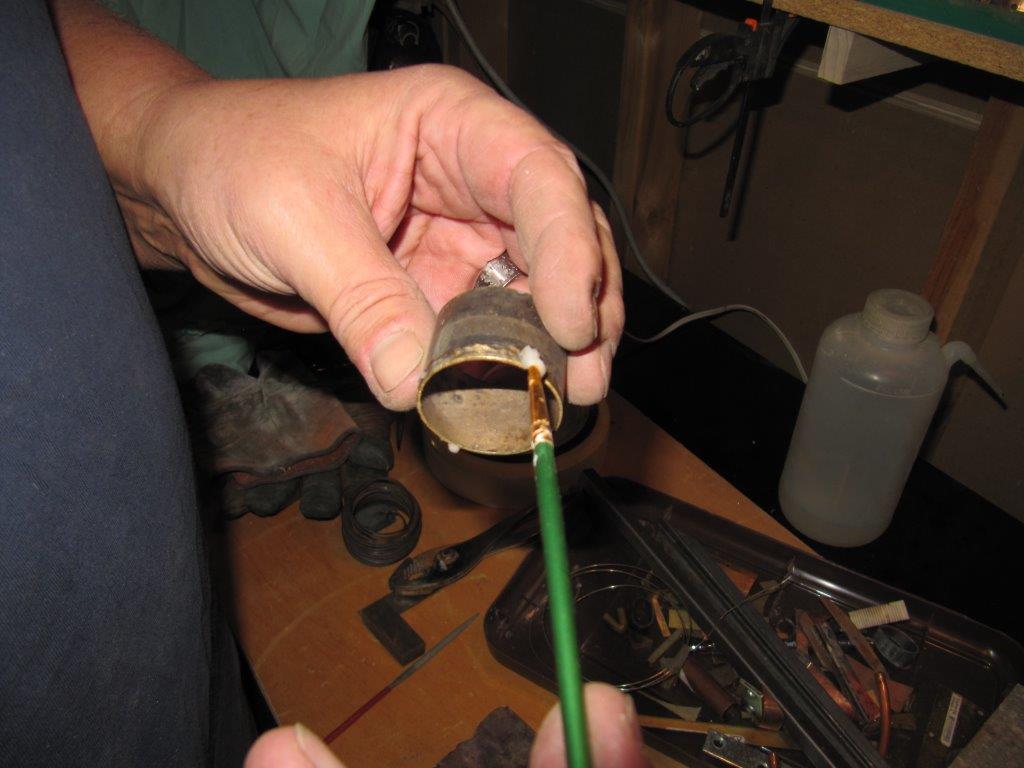
Silver solder flux comes as a paste and it sticks better to the material as a paste. When heated it turns white and then to a liquid. Flux the joint thoroughly. Heat the part to be soldered to allow the flux to adhere to the material. Flux must always be used when attempting to silver solder. Continue to heat the part to the required temperature (cherry red) and apply solder to one corner of the joint. Copper was used for this demo due to it's heat transferance abilities. Once the metal was at the correct temperature and the flux looked like molten glass the solder was applied to a corner of the joint and flowed along the length of the joint with little effort soldering the seam. Flux and solder will always go towards the hottest part of the material. Due to gravity it is best to have the joint to be soldered in the down position. Molten flux has a habit of flowing down hill and the silver solder will follow in it's molten state anywhere it is not needed and is wasteful.
Silver solder flux comes as a paste and it sticks better to the material as a paste. When heated it turns white and then to a liquid. Flux the joint thoroughly. Heat the part to be soldered to allow the flux to adhere to the material. Flux must always be used when attempting to silver solder. Continue to heat the part to the required temperature (cherry red) and apply solder to one corner of the joint. Copper was used for this demo due to it's heat transferance abilities. Once the metal was at the correct temperature and the flux looked like molten glass the solder was applied to a corner of the joint and flowed along the length of the joint with little effort soldering the seam. Flux and solder will always go towards the hottest part of the material. Due to gravity it is best to have the joint to be soldered in the down position. Molten flux has a habit of flowing down hill and the silver solder will follow in it's molten state anywhere it is not needed and is wasteful.
Drop your piece into the pickle or water. if using iron wire remove the piece very quickly out of the pickle after it has cooled. Rinse in water and remove the binding wire. Return the soldered piece back into the pickle and leave for 30 mins. to further remove scale. If the iron binding wire is left on and in the pickle it will deposit iron ions into the pickle which will be picked up by the soldered material and your brass or silver will eventually turn into iron.
The soldered material was left in the pickle for approx 30 mins. to one hour after which it was removed and well rinsed with clean water. Now inspect the soldered joint to see if the solder has fully sealed it. Also check to see that all the flux has been removed. If the joint has not been fully soldered then repeat the process of soldering again. Remember that the more the material is heated the more oxidization occurs.
The soldered material was left in the pickle for approx 30 mins. to one hour after which it was removed and well rinsed with clean water. Now inspect the soldered joint to see if the solder has fully sealed it. Also check to see that all the flux has been removed. If the joint has not been fully soldered then repeat the process of soldering again. Remember that the more the material is heated the more oxidization occurs.
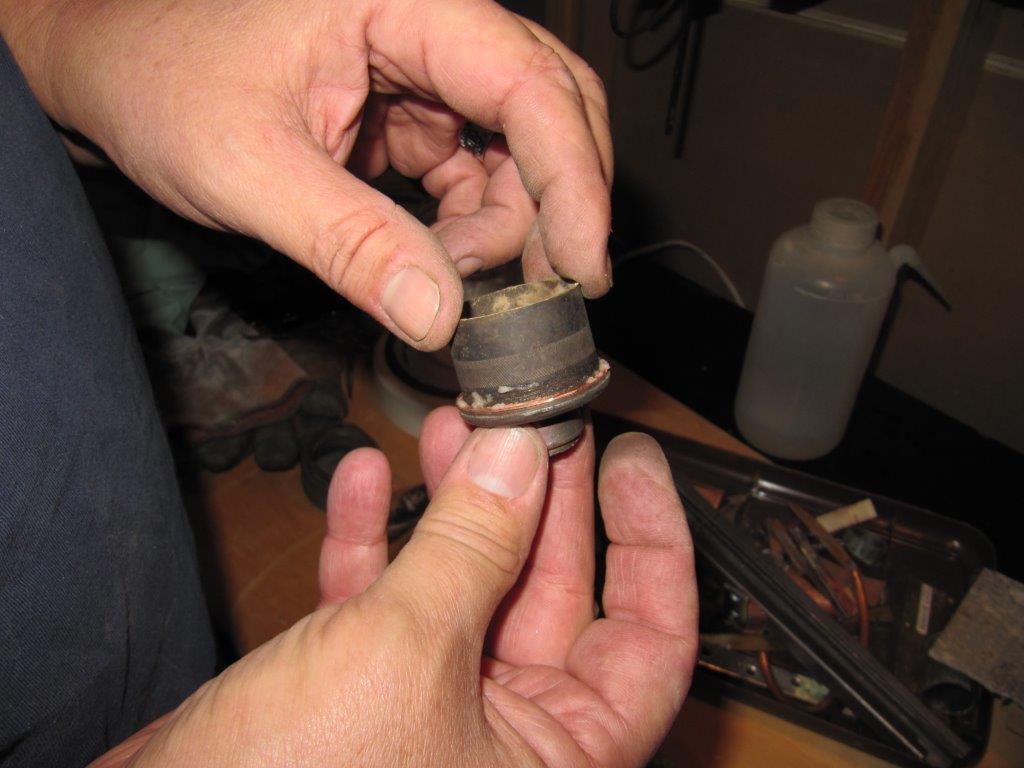
Now clean up the finished joint
using a variety of abrasive tools. A belt sander, hand held Foredom (TM) sanding drums, wheels and files. This is the time to remove any solder over flow. This is also the time you will notice if there are any gaps in the joint; if so re-solder.
Once satisfied with the cleaning go ahead and polish your creation.